
Ever notice your desktop suddenly stops turning on? It can be really annoying when your computer shows error messages that don't make sense. This guide walks you through a simple step-by-step plan to check common issues, like loose power cables or a faulty power supply. With these easy fixes, you'll quickly figure out if the problem is with the hardware or the software and get your system up and running again.
Desktop Computer Troubleshooting Fundamentals
Begin by using a clear, step-by-step method when your desktop acts up. First, rule out simple issues like a disconnected power cable or a failing power supply. This method helps you decide if the problem is with the hardware or the software and can quickly fix issues such as blue screens.
-
Power-cable check
Make sure your power cable is snugly connected to both the outlet and your computer. This basic check often saves time. -
PSU voltage test
Use a multimeter (a tool to measure voltage) to see if your power supply is delivering the right voltage. -
POST beep interpretation
Listen for beep codes during startup. Odd beep patterns may signal problems with the CPU, RAM, or video card. -
Safe Mode entry
Boot into Safe Mode to see if the issue is software-related. If your computer runs fine in Safe Mode, a recent driver update might be the culprit. -
Task Manager review
Open Task Manager to check if any program is using too much CPU or memory. High usage here can cause crashes or freezing. -
Basic hardware reseat
Remove and then reinsert parts like your RAM or graphics card. This helps ensure all components are properly connected.
Keep a log of what you find during each step. Write down error codes, beep patterns, and how the system performs in Safe Mode. Regular checks and reseating of components can help prevent future issues and keep your desktop running smoothly.
Power-On and Boot Failure Fixes

If your desktop won't start or shows boot errors, first check that all power cables are set firmly in place. A loose cable or a bad power supply unit (PSU) can cause these problems. Make sure each cable is connected well from your computer to the outlet. You can use a multimeter (a tool that measures voltage) to see if your PSU is giving the right power. Sometimes a BIOS error (settings in the computer's firmware) might cause boot issues like a "No Boot Device" message. In that case, refreshing or updating the BIOS can help.
- Inspect power cables: Ensure all connections are secure and undamaged.
- Test the PSU with a multimeter: Confirm that voltage levels match the specs.
- Reset the CMOS battery: Remove and then replace the battery to reset BIOS settings.
- Flash or roll back the BIOS: Update the firmware or revert to a known stable version.
- Run boot-sector repair: Use the Windows Recovery Environment or a bootable USB to fix boot sector errors.
If these steps do not fix the problem, you might need to replace the faulty parts or call a technician. These actions can save you time and prevent more damage to your system.
Hardware Diagnostics and Component Checks
Listening to POST beep codes is the first step in spotting hardware problems. These beeps can highlight issues with the CPU, RAM, or video card. For example, quick beeps may mean a memory error, while a string of long beeps might point to a video card fault. Pay close attention during startup for these hints.
-
RAM reseat and memtest
Remove your RAM modules and reinstall them to ensure a firm connection. Next, run a memtest tool to check for memory errors that could cause system hiccups. -
HDD SMART check
Use diagnostic tools to run a Self-Monitoring, Analysis, and Reporting Technology (SMART) check. This test will tell you if your hard drive has problems like bad sectors or firmware issues. -
GPU seating and temperature monitoring
Make sure your graphics card is properly seated in its slot. Then, use temperature monitoring software to see if overheating might be affecting its performance. -
Fan speed and voltage inspection
Check that your cooling fans are running at the right speeds and that voltage levels match the manufacturer’s recommendations. Odd noises like clicking or grinding can indicate that a fan or drive is about to fail.
Write down each test result. Note any error codes, temperature readings, or unusual behavior. Keeping detailed records will help you track recurring issues and provide valuable information if you consult a technician.
Software Glitch Resolution and OS Repair

If your computer starts acting up, booting into Safe Mode is a smart first step. In this mode, only the basic files and drivers load. This helps you figure out if extra updates, drivers, or damaged files are causing the problem.
Try these steps:
- Disable recent updates or drivers: New updates or drivers can sometimes cause errors. Turning them off may bring back stability.
- Run sfc /scannow: This command checks your computer's system files and fixes any that are missing or broken.
- Execute DISM repair commands: These commands fix deeper issues that the system file checker might overlook.
- Check default app settings: Incorrect program settings can cause file issues. Adjust these in the Control Panel.
- Perform a last-known-good restore: If your computer worked well before, restoring it to that state might clear the errors.
If you still see problems like the Blue Screen of Death, you might need to reinstall Windows completely. Use media creation tools or the built-in recovery options to do this. Remember to back up your important files to an external drive or cloud storage before you reinstall.
Following these steps will help you fix common software glitches and keep your system stable over time.
Performance Tuning and Overheating Solutions
Begin by opening Task Manager to spot apps that hog your computer’s resources. Task Manager shows which programs use too much CPU or RAM. If a process runs continuously with high usage, it might cause your PC to overheat. For instance, if you notice a program using 80% CPU, it’s time to optimize its resource use.
-
Disk cleanup and defragmentation
Remove temporary files and run a defragmentation tool to organize your hard drive. This helps cut down delays caused by fragmented files. -
Uninstall unused apps
Delete programs you no longer use. This frees up system resources and cuts down on unnecessary background tasks. -
Internal dust removal
Clean out cooling fans and vents thoroughly. Dust build-up can block airflow, leading to higher temperatures and poorer performance. -
Reapply thermal paste
Over time, the thermal paste on your CPU can dry out. Remove the old paste and apply a new layer to improve heat transfer. -
Adjust fan curves in BIOS
Enter your BIOS settings and tweak the fan speeds. Proper adjustments help maintain cooler temperatures and boost system stability.
Use monitoring tools to keep an eye on your system’s temperature and CPU usage. These utilities help ensure your PC runs efficiently and stays cool over time.
Network and Connectivity Troubleshooting
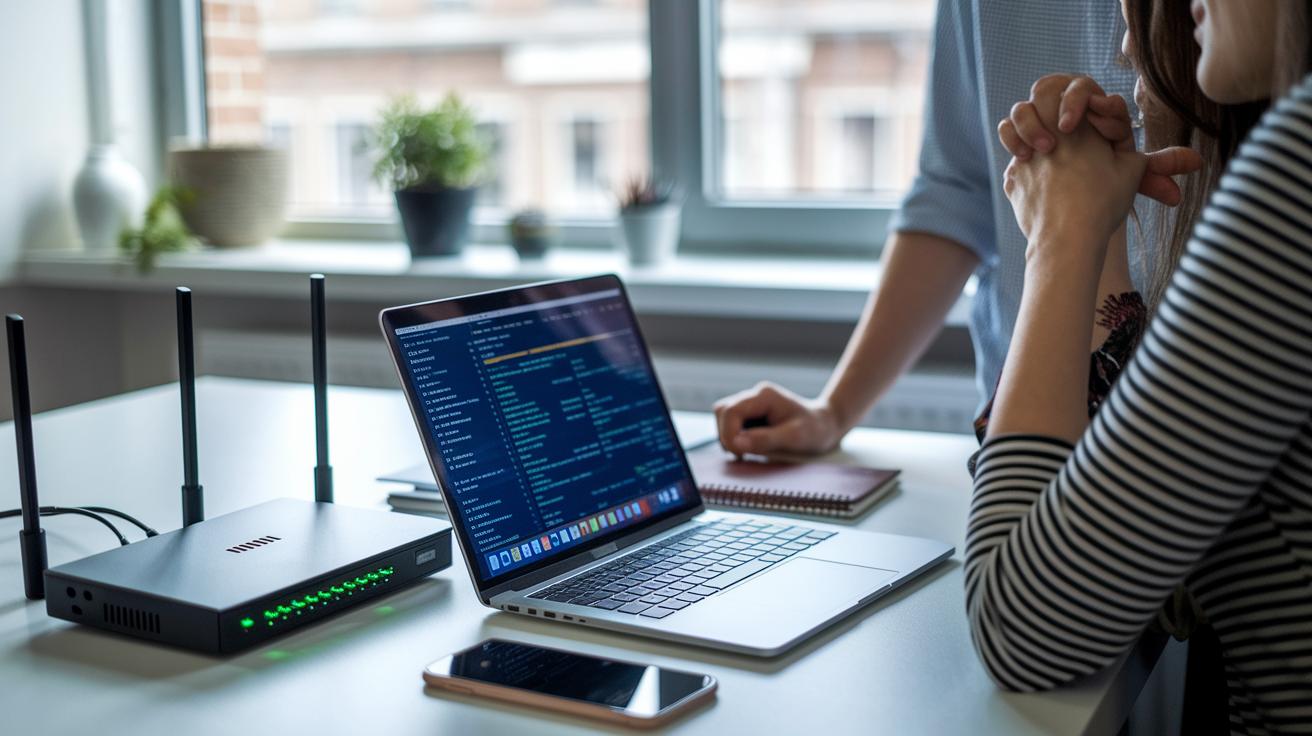
Keeping your network adapter drivers current is key for steady connectivity. Old drivers can cause Wi-Fi drops, and issues with network cards or clashes with security software may interrupt your LAN connection. A quick restart of your modem or router often fixes basic IP registration issues, and checking your settings can clear up any leftover problems.
To fix these issues, try these steps:
- Reboot network gear: Turn your modem and router off and on to set up a new connection.
- Update NIC/WLAN drivers: Open your device manager and install the latest drivers to fix software conflicts.
- Reset the TCP/IP stack using Command Prompt: Run the necessary commands to remove outdated or corrupted network settings.
- Verify DNS and DHCP settings: Make sure these are set up right for proper IP address assignment.
These simple steps help uncover misconfigurations and lead you to easy fixes without advanced tools. Regular checks can stop future issues.
Once you complete these steps, test your connection with another device or a different network cable. Watching the changes in performance helps you decide if the problem is with your computer or the network. Tracking these changes over time lets you stay ahead of any connectivity issues.
Peripheral and External Device Issue Resolution
First, check your cables and ports. Look for any damage or loose connections. A bad cable or port can make keyboards, printers, and external drives act up or stop working.
-
Toggle Ease of Access settings
If your keyboard clicks but does not type, Filter or Toggle Keys may be turned on. Turn these off in the Ease of Access settings. -
Reinstall USB controllers
Open Device Manager. Uninstall the USB controllers and then reinstall them. This can fix devices that do not respond. -
Update audio/graphics drivers
Old drivers can cause problems with drives or displays. Update your audio and graphics drivers to keep everything running smoothly. -
Restore Start menu features via Windows Features
If parts of your Start menu, like the search field, are missing, go to Windows Features and re-enable them.
If problems still happen, try plugging the device into another computer to see if the issue persists.
Final Words
In the action, we walked through desktop troubleshooting fundamentals, sharing clear steps from power-on checks to OS repairs. We covered power and boot fixes, hardware diagnostics, performance tuning, network troubleshooting, and peripheral fixes. The guide breaks down each step so you can easily track errors and make improvements. This desktop computer troubleshooting guide turns complex tasks into simple, real-world solutions. Stick with these practical tips and enjoy a smoother, more reliable computing experience.
FAQ
Q: What does a Dell desktop computer troubleshooting guide and gaming desktop troubleshooting guide typically cover?
A: The Dell and gaming desktop troubleshooting guides explain basic checks like verifying power connections, testing the power supply, reseating hardware, interpreting beep codes, and entering Safe Mode to help you quickly spot common issues.
Q: What are some common computer problems and where can I find a list with solutions?
A: A list of common computer problems covers issues like power failures, freezing screens, memory errors, and Blue Screen of Death. Such PDFs or guides also offer clear steps to resolve these faults with practical fixes.
Q: Can I diagnose PC issues myself?
A: You can diagnose PC issues yourself by starting with simple checks like verifying cable connections, listening for POST beeps, and accessing Safe Mode. These steps help you identify hardware or software errors before calling a technician.
Q: What are the basic troubleshooting procedures for desktop computer problems?
A: The basic troubleshooting procedures include checking power cables, testing PSU voltage, interpreting POST beep codes, entering Safe Mode, reviewing Task Manager, and performing a hardware reseat. These clear steps help isolate the root cause.
Q: What PC repair software options are available, including free online tools?
A: PC repair software options include free online tools that scan for errors and help repair corrupted files. These tools guide you through disabling faulty drivers, conducting system file checks, and using recovery options.
Q: How can I solve PC troubleshooting problems effectively?
A: To solve PC troubleshooting problems effectively, use a methodical approach by following step-by-step diagnostics like power checks, Safe Mode tests, and hardware reseats. Documenting findings and preventive maintenance can lead to lasting fixes.

